Enable PHP-FPM connection status page on Cpanel

Sometime we need to monitor PHP-FPM status page on Cpanel. Default configuration on pm.status_path is Enable (/status). But when I tried to access curl http://domain.tld/status does not display anything

So, if we are able to enable php-fpm/status on httpd files:

vi /usr/local/apache/conf/httpd.conf
Find the The proxy_fcgi_module section of your domain.tld that already exists. I added <LocationMatch>. Below is configuration that I have added :

<LocationMatch "/(ping|status">
order deny,allow deny from all
allow from 10.1.0.88/24
SetHandler proxy:unix:/opt/cpanel/ea-php56/root/usr/var/run/php-fpm/704111e30605df7498d93fc41c85aebedf83b0ad.sock|fcgi://domain.tld
<LocationMatch >

Restart apache service then we can curl http://domain.tld/status
# curl http://domain.tld/status
pool: domain.tld
process manager: ondemand
start time: 10/Feb/2020:02:36:59 +0700
start since: 479
accepted conn: 14
listen queue: 0
max listen queue: 0
listen queue len: 0
idle processes: 0
active processes: 1
total processes: 1
max active processes: 1
max children reached: 0
slow requests: 0

Galera Cluster Wont Start

Today I took a looked my docker application that connected to Galera.
I found the docker was not connected to Galera. After further checking, the 3 VMs of galera servers were hung.

After rebooted those servers, Galera cluster was not running in db1, db2 or db3.
Below how to resolve it:

1. Check which server has the most up to date database information (highest segno) :
cat /var/lib/mysql/grastate.dat
#GALERA saved state
version: 2.1
uuid: 012bb14a-ccb3-11e9-821b-47eef73d1daf
seqno: -1
safe_to_bootstrap: 0

2. Since all VMs have same seqno value, I tried to place the InnoDB tablespace into a consistent state in db3
mysqld –wsrep-recover

3. On the db3 change the ‘safe_to_bootstrap : 0’ to ‘safe_to_bootstrap : 1’
vi /var/lib/mysql/grastate.dat

4. On db3 bootstrap the new cluster
galera_new_cluster

5. Start Mysql server on the other servers (db1 and db2)
systemctl start mysql

6. After all mysql server are running on all servers. Verify how many server on the current cluster
show status like 'wsrep_cluster_size';
+--------------------+-------+
| Variable_name | Value |
+--------------------+-------+
| wsrep_cluster_size | 3 |
+--------------------+-------+
1 row in set (0.001 sec)


Reference:
https://linuxresolved.com/troubleshooting-galera-cluster-wont/


Expand and Replace disk ZFS on Proxmox

I have 2 disk in Proxmox lab that configured with RAID 1
sda = 20GB
sdb = 20GB
It have total capacity 20GB

I will increase the disk size to be 30GB. So that, I insert 2 new disks
sdc = 30GB
sdd = 30GB
It will have total capacity 30GB

Below is the steps that will be done on this task

  1. Replace sdb with sdc
  2. Replace sda with sdd
  3. fdisk /dev/sdc and /dev/sdd to expand the disk
  4. Expand zfs on rpool
  5. Detach old disks from server
Current rpool status
# zpool status
pool: rpool
state: ONLINE
scan: resilvered 900M in 0h12m with 0 errors on Fri Jun 7 15:35:41 2019
config:

NAME STATE READ WRITE CKSUM
rpool ONLINE 0 0 0
mirror-0 ONLINE 0 0 0
sda3 ONLINE 0 0 0
sdb3 ONLINE 0 0 0

1. Replace sdb with sdc

sgdisk -R /dev/sdc /dev/sda             (sgdisk -R /dev/newdisk /dev/olddisk)

sgdisk -G /dev/sdc                      (sgdisk -G /dev/newdisk)

grub-install /dev/sdc                   (grub install)

zpool replace rpool /dev/sdb3 /dev/sdc3 (replace the disk)

Waiting the resilvering process until it done. After that, continue to replace disk on sda

2. Replace sda with sdd

sgdisk -R /dev/sdd /dev/sdc
sgdisk -G /dev/sdd
grub-install /dev/sdd
zpool replace rpool /dev/sda3 /dev/sdd3
Waiting the resilvering process until it done.

3. fdisk /dev/sdc and /dev/sdd to expand the disk

fdisk /dev/sdc:

Current disk layout :
Device Start End Sectors Size Type
/dev/sdc1 34 2047 2014 1007K BIOS boot
/dev/sdc2 2048 1050623 1048576 512M EFI System
/dev/sdc3 1050624 41943006 40892383 19.5G Solaris /usr & Apple ZFS
Choose d (delete the last partition partitin 03)
Choose n (create new partion for partition 03)
Do you want to remove the signature? [Y]es/[N]o: N (Type N to avoid any disk corruption)
Choose t then Type 48 for Solaris /usr & Apple ZFS partition type
Choose w (to write the new partition)

Disk layout after expand the disk:
Device Start End Sectors Size Type
/dev/sdc1 34 2047 2014 1007K BIOS boot
/dev/sdc2 2048 1050623 1048576 512M EFI System
/dev/sdc3 1050624 62914526 61863903 29.5G Solaris /usr & Apple ZFS

fdisk /dev/sdd: Do the same above steps to expand /dev/sdd

partprobe (to detect new disk layout)

4. Expand zfs on rpool

zpool set autoexpand=on rpool
zpool online -e rpool /dev/sdc3
zpool online -e rpool /dev/sdd3
zpool set autoexpand=off rpool

root@prox3:~# zpool status
pool: rpool
state: ONLINE
scan: resilvered 900M in 0h12m with 0 errors on Fri Jun 7 15:35:41 2019
config:

NAME STATE READ WRITE CKSUM
rpool ONLINE 0 0 0
mirror-0 ONLINE 0 0 0
sdb3 ONLINE 0 0 0
sdc3 ONLINE 0 0 0

5. Detach the Old disks from the server. After that, restart the server.
The disk layout will change as follow

root@prox3:~# zpool status
pool: rpool
state: ONLINE
scan: resilvered 900M in 0h12m with 0 errors on Fri Jun 7 15:35:41 2019
config:

NAME STATE READ WRITE CKSUM
rpool ONLINE 0 0 0
mirror-0 ONLINE 0 0 0
sda3 ONLINE 0 0 0
sdb3 ONLINE 0 0 0

Pengecekan Disk dengan MegaCli

  1. Apabila ada missing information dari slot berarti itu yang rusak
    /opt/MegaRAID/MegaCli/MegaCli64 -AdpAllInfo -aALL (liat informasi raid)
    Cek bagian ini
    Device Present
    ================
    Virtual Drives : 2
    Degraded : 1
    Offline : 0
    Physical Devices : 16
    Disks : 14
    Critical Disks : 0
    Failed Disks : 0
  2. /opt/MegaRAID/MegaCli/MegaCli64 -cfgdsply -aall | grep -i ‘firmware state’ (liat jumlah drive dan status yang failed )
  3. /opt/MegaRAID/MegaCli/MegaCli64 -PDList -aALL (Missing slot)
  4. /opt/MegaRAID/MegaCli/MegaCli64 -PDInfo -PhysDrv [EnclosureID:SlotNumber] -aALL
    /opt/MegaRAID/MegaCli/MegaCli64 -PDInfo -PhysDrv [32:2] -aALL  — (Info detail tentang disk yang rusak)
    SN didapatkan pada Inquiry Data: W1F1M98FST3000DM001-1CH166 CC24 (ST3000DM001-1CH166)

===================================

Status disk Disk Unconfigured (Good) – Reference Article https://www-01.ibm.com/support/docview.wss?uid=swg21988146

  1. Lakukan langkah 1, 2, 3 . Hasilnya
    Adapter 0
    ….
    Enclosure Device ID: 32
    Slot Number: 2
    Drive’s position: DiskGroup: 1, Span: 0, Arm: 2
    Enclosure position: 1


    Firmware state: Failed
  2.  Setelah mendapatkan lokasi failed disk, jalankan command

    /opt/MegaRAID/MegaCli/MegaCli64 -pdgetmissing -aALL – maka akan ditampilkan Array dan row position drive di RAID Array

    [root@secstor01 ~]# /opt/MegaRAID/MegaCli/MegaCli64 -pdgetmissing -aALL

    1. Adapter 0 – Missing Physical drivesNo. Array Row Size Expected
      0        1         2     2861056 MB
  3. Tempatkan missing drive dari hasil di langkah 1 ke RAID Array hasil dari langkah 2 dengan command :

    /opt/MegaRAID/MegaCli/MegaCli64 -PdReplaceMissing -PhysDrv [32:2] -Array1 -row2 -a0

  4. /opt/MegaRAID/MegaCli/MegaCli64 -PDRbld -Start -PhysDrv [32:2] -a0 (Start rebuilding)
  5. /opt/MegaRAID/MegaCli/MegaCli64 -PDRbld -ShowProg -PhysDrv [32:2] -a0 (Melihat proses rebuilding)


Mount LVM yang memiliki VG name sama

Berikut cara untuk mount VG name yang memiliki nama yang sama di Linux :

sudo pvscan #Use this to verify your LVM partition(s) is/are detected.
sudo vgscan -v #Scans for LVM Volume Group(s)
sudo vgchange -ay #Activates LVM Volume Group(s)
sudo lvscan #Scans for available Logical Volumes


Jika VG name sama maka lakukan

vgdisplay | egrep -i “uuid|name”

Dari command diatas maka akan diketahui UUID dari disk yang lama. Untuk mengetahui UUID dari disk baru, dapat diketahui dari command vgscan -v.

lvs
vgrename -v UUID_disk_lama vg_old_disk #rename disk
vgscan
lvscan  #melihat hasil setelah rename VG name, apabila inactive jadikan active
lvchange -ay /dev/vg_old_disk/root   #mount root direktori
lvscan  #melihat hasil VG name menjadi active

mkdir /mnt/olddata
mount /dev/vg_old_disk/root /mnt/olddata

referensi
https://unix.stackexchange.com/questions/339011/how-do-i-mount-an-lvm-partition
https://www.thegeekdiary.com/centos-rhel-how-to-activate-and-mount-2-volume-groups-with-same-names/

Konek VPN tetapi Tidak Bisa Konek Internet

Apabila mengalami konek VPN tetapi tidak bisa konek internet berarti PC kita menggunakan routing dari VPN tersebut. Cara mengatasinya kita bisa menambahkan routing atu merubah konfigurasi VPN kita seperti di link berikut :

https://documentation.meraki.com/MX/Client_VPN/Configuring_Split_Tunnel_Client_VPN

Apabila ingin mudahnya kita bisa menjalankan commad berikut sebelum melakukan koneksi VPN

Set-VpnConnection -Name "nama_VPN" -SplitTunneling $True

Install DELL Raid (OMSA) Linux

Set up the Dell OpenManage Repository
# wget -q -O – http://linux.dell.com/repo/hardware/latest/bootstrap.cgi | bash
Install OMSA
# yum install srvadmin-all

If you get error on EPEL, follow below steps
https://community.hpcloud.com/article/centos-63-instance-giving-cannot-retrieve-metalink-repository-epel-error
Please run : sudo sed -i “s/mirrorlist=https/mirrorlist=http/” /etc/yum.repos.d/epel.repo

Start OMSA Services.
# service snmpd restart
# /opt/dell/srvadmin/sbin/srvadmin-services.sh restart
Run the following command to enable autostart of the service after reboot:
# /opt/dell/srvadmin/sbin/srvadmin-services.sh enable

Jangan Lupa menambahkan allow port 1311 di Iptable
vi /etc/sysconfig/iptables
-A INPUT -m state –state NEW -m tcp -p tcp –dport 1311 -j ACCEPT
/etc/init.d/iptables restart

Install RAID 3ware on Linux

wget ftp://tsupport:tsupport@ftp0.broadcom.com/private/3Ware/downloads/3DM2_CLI-Linux_9.5.4_10.2.1.zip
unzip 3DM2_CLI-Linux_9.5.4_10.2.1.zip
chmod +x install.sh
./install.sh -i

ftp://tsupport:tsupport@ftp0.broadcom.com/private/3Ware/downloads/3DM2_CLI-Linux_9.5.4_10.2.1.zip

If https://localhost:888 can not open, replace 3dm2 version with :
wget ftp://tsupport:tsupport@ftp0.lsil.com/private/3Ware/3dm2_kb16625.zip
unzip 3dm2_kb16625.zip
or
wget http://85.192.170.134:8080/Public/3dm2_kb16625/linux/x86_64/3dm2

move 3dm2 file to /usr/sbin
cd /usr/sbin
chmod 755 3dm2

kill 3dm2 pid
ps -aux | grep 3dm2

start 3dm2
/usr/sbin/3dm2 start

https://www.broadcom.com/support/knowledgebase/1211161497860/10.2.1-codeset

Install Cpanel/WHM menggunakan Glue Records dari Freenom.com

Pada tutorial ini saya ingin berbagi cara membuat domain gratisan dari Freenom dan membuat Glue Records pada Freenom agar server Cpanel yang akan kita install dapat berfungsi sebagai DNS Server.

Sebelum kita membuat glue records, sebaiknya kita mendaftar dulu nama domain yang ingin kita pakai pada freenom.com. Freenom memberikan kita domain secara cuma-cuma yang kita bisa pakai untuk pembelajaran. Pada tutorial ini saya menggunakan nama thyspir.ml pada Freenom.

Pembuatan Glue Records

Setelah domain thyspir.ml sudah terdaftar pada Freenom, saatny kita membuat glue records.

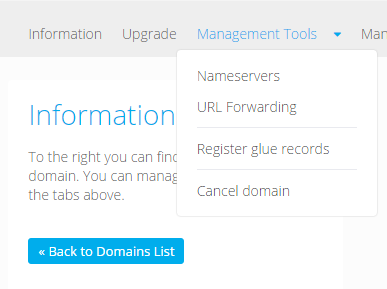
Kita klik Manage Domain – Management Tools –  Register glue records

glue-records

Setelah itu tinggal kita register nameserver ns1.thyspir.ml dan ns2.thyspir.ml dan masukkan IP Address dari VPS server yang akan digunakan. Rubah namserver pada Frenom mengarah ke ns1.thyspir.ml dan ns2.thyspir.ml.

Install Cpanel pada VPS

Berikut langkah- langkah install Cpanel

  1. cd /home && curl -o latest -L https://securedownloads.cpanel.net/latest && sh latest
  2. Setelah install CPanel selesai. Maka akan terdapat proses setup pada WHM, silahkan arahkan nameserver dari Cpanel/WHM ke ns1.thyspir.ml & ns2.thyspir.ml beserta IP Address dari nameserver tersebut.
  3. Setelah itu buat DNS Zone di Add a DNS Zone – create thyspir.ml & proceed. Sekarang kita mempunyai domain thyspir.ml on WHM.
    WHM dapat juga sebagai DNS server selama domain yang berada pada WHM tersebut menggunakan nameserver ns1.thyspir.ml & ns2.thyspir.ml dan melakukan pointin dari registrar ke nameserver tersebut.
  4. Kita bisa menambahkan DNS Zone untuk domain lainnya seperti thyspir.cf pada WHM di menu Add a DNS Zone. Stelah itu pada registrar melakukan pointing NS dari thyspir.cf ke ns1.thyspir.ml & ns2.thyspir.ml.

NB: setelah kita memasukkan IP Address nameserver pada proses setup WHM, maka kita dapat melakukan ping ke ns1.thyspir.ml dan ns2.thyspir.ml

Install CSF (ConfigServer Security & Firewall) pada Cpanel

Setelah semua konfigurasi telah selesai, sekarang kita bisa menginstall firewall pada Cpanel. Firewall yang kita gunakan menggunakan CSF. Firewall ini free dan bisa prevent attack dari sisi network. Berikut langkah instalasinya

wget https://download.configserver.com/csf.tgz
tar -xzf csf.tgz
cd csf
./install.cpanel.sh

Setelah instalasi selesai. Status dari CSF adalah Firewall Status: Enabled but in Test Mode
Kita dapat merubahnya menjadi active pada CSF – Firewall Configuration -Rubah Value Testing menjadi 0 – klik Change & restart csf+lfd